 Save
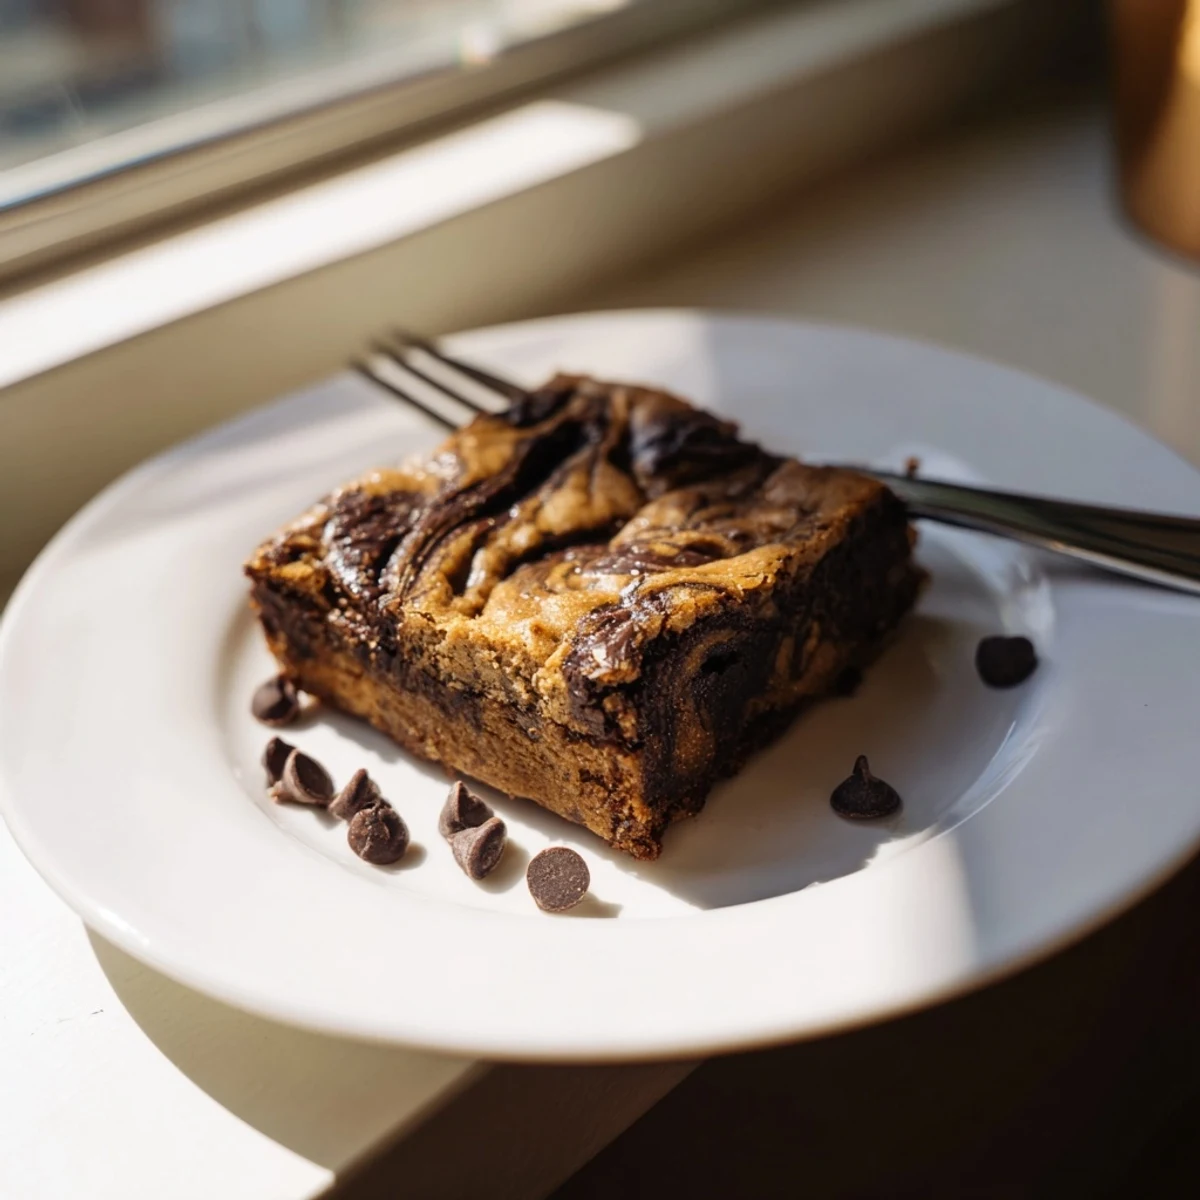
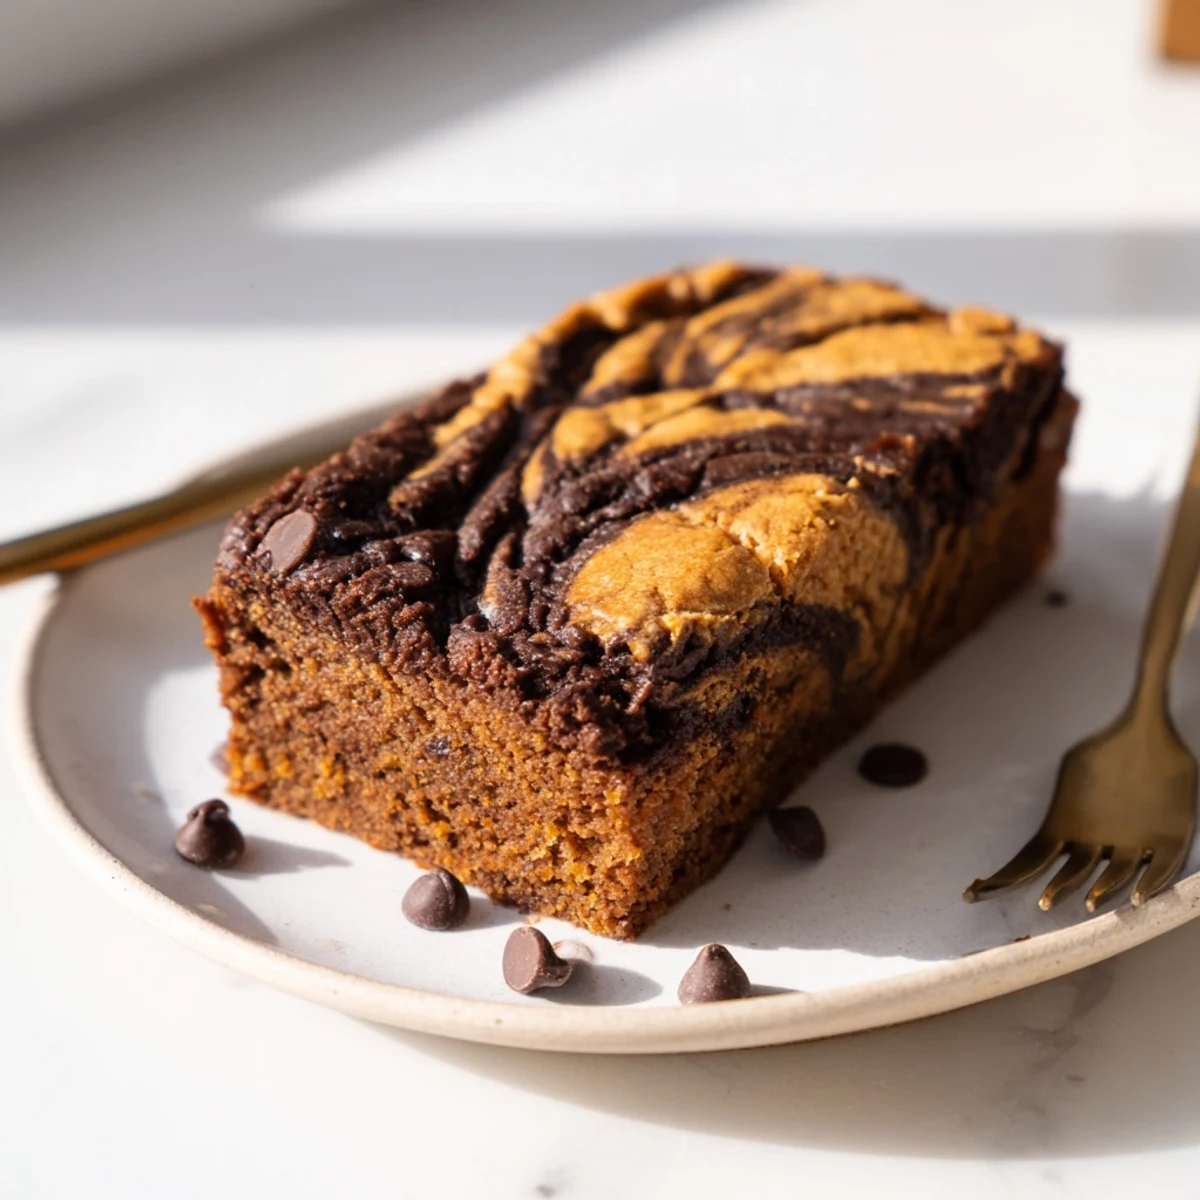
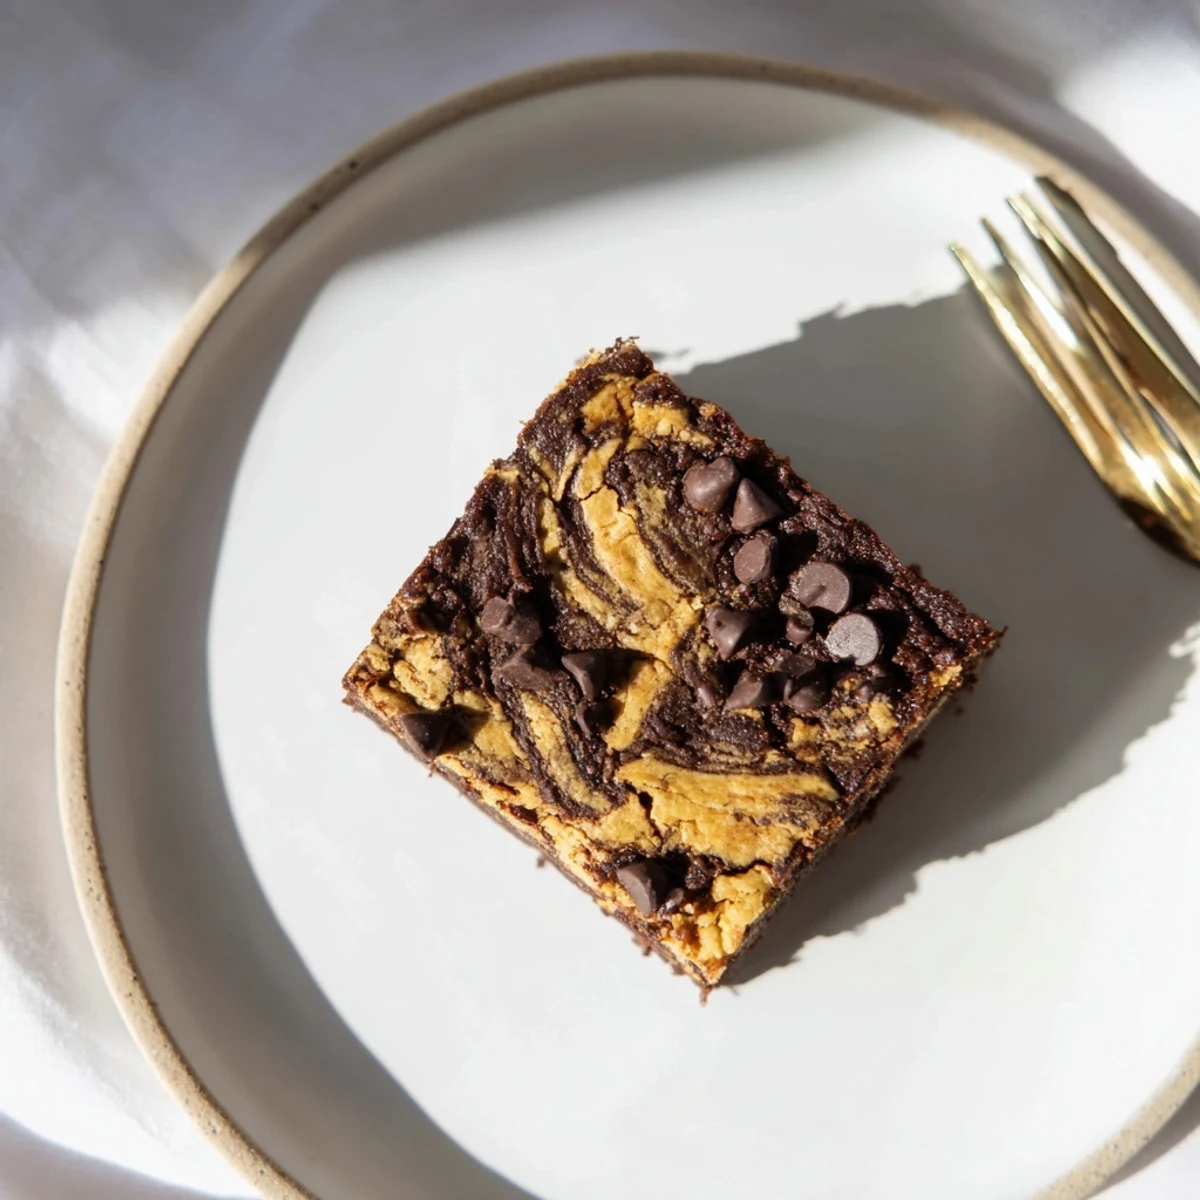
Save These indulgent bars combine the best of both worlds—rich, fudgy brownie layers swirled with moist banana bread batter. The marbled effect creates beautiful patterns while the dual flavors satisfy both chocolate and banana cravings. Perfect for potlucks, bake sales, or afternoon treats, these bars come together in just 15 minutes of prep time.
The secret lies in creating two separate batters: a classic banana bread base and a dense cocoa brownie mixture. When swirled together and baked, they form a tender yet fudgy texture with pockets of melted chocolate chips throughout. Serve them warm with ice cream for an extra-special dessert, or enjoy them at room temperature for a portable snack.
Last winter my sister dropped off a bunch of spotted bananas she swore were too far gone for anything but baking. I'd been meaning to experiment with marbled batters for months, something about the way two flavors weave together caught my imagination. The kitchen still smelled like morning coffee when I pulled these from the oven, and I honestly could not believe how perfectly the fudgy chocolate played with that sweet banana warmth. Now I keep extra bananas in the freezer just for this recipe.
My brother in law who usually turns his nose up at anything banana related ended up eating three of these at our last game night. He kept asking what made them so different from regular brownies, and when I finally told him, he just shrugged and reached for another. Watching someone rewrite their entire opinion on an ingredient because of one really good bite is exactly why I love playing with recipes like this.
Ingredients
- 1 cup ripe bananas, mashed: The more spotted and overripe these are, the sweeter and more flavorful your layer will be
- 1/2 cup granulated sugar for banana layer: You can reduce this slightly if your bananas are super sweet
- 1/3 cup unsalted butter, melted (banana layer): Let it cool slightly before mixing so it doesnt scramble your egg
- 1 large egg (banana layer): Room temperature eggs blend more smoothly into the batter
- 1 tsp vanilla extract (banana layer): Pure vanilla makes such a difference here
- 1 cup all-purpose flour (banana layer): Spoon and level the flour rather than scooping directly
- 1/2 tsp baking powder: This gives the banana layer that gentle rise
- 1/4 tsp baking soda: Works with the acidic bananas to create lift
- 1/4 tsp salt (banana layer): Balances all that sweetness
- 1/2 cup unsalted butter, melted (brownie layer): Use good quality butter, it really matters here
- 3/4 cup granulated sugar (brownie layer): This creates that crackly shiny top we love
- 2 large eggs (brownie layer): These provide structure and that fudgy texture
- 1 tsp vanilla extract (brownie layer): Dont skip this, it amplifies the chocolate
- 1/3 cup unsweetened cocoa powder: Dutch process gives a deeper flavor but regular works too
- 1/2 cup all-purpose flour (brownie layer): Just enough to hold everything together
- 1/4 tsp salt (brownie layer): Makes the chocolate taste more intense
- 1/2 cup semi-sweet chocolate chips: Fold these in gently so you dont knock air out of the batter
Instructions
- Preheat your oven to 350°F (175°C):
- Line an 8x8-inch baking pan with parchment paper, leaving those wings hanging over the sides. This overhang is your best friend for lifting the bars out later without making a mess.
- Mix the banana layer:
- In a medium bowl, combine the mashed bananas, sugar, melted butter, egg, and vanilla. Stir until everything is incorporated and the mixture looks smooth and glossy.
- Add dry ingredients to banana batter:
- Sprinkle in the flour, baking powder, baking soda, and salt. Fold everything together just until you dont see dry streaks anymore, then set this bowl aside.
- Whisk the brownie batter:
- In another bowl, whisk together the melted butter and sugar until theyre glossy and combined. Add the eggs and vanilla, beating until the mixture looks smooth and slightly thickened.
- Complete the brownie layer:
- Sift in the cocoa powder, flour, and salt, then stir until just combined. Gently fold in those chocolate chips last.
- Layer and marble the batters:
- Spread half the banana batter in your prepared pan, spoon all the brownie batter over it, then drop the remaining banana batter in dollops on top. Run a knife through everything once or twice for that marble effect, but dont overdo it.
- Bake until just set:
- Bake for 28 to 32 minutes until a toothpick comes out with moist crumbs but not wet batter. The center should still have a tiny bit of wobble when you gently shake the pan.
- Cool completely before slicing:
- Let the bars cool completely in the pan, at least an hour or two. Use that parchment overhang to lift them out, then slice into 16 squares with a sharp knife.
 Save
Save My neighbor texted me at midnight after I dropped off a plate of these, asking if I was awake because she needed to talk about how good they were. We ended up sitting on her porch in the dark eating another bar each while she confessed she'd never understood why people baked from scratch until now.
Getting That Perfect Marble
The trick is not over swirling your knife through the batters. Just one or two gentle figure eights, maybe three passes max. You want distinct ribbons of each batter running through, not a muddy mess where they've completely blended together. Think of it like folding ingredients together, not mixing them.
Making Them Ahead
These bars keep beautifully for three or four days at room temperature, wrapped tightly. The banana actually keeps them moist much longer than regular brownies. You can also wrap the whole uncut slab in plastic and foil, then freeze for up to three months. Thaw overnight on the counter before slicing.
Serving Ideas
My absolute favorite way to serve these is slightly warmed with a scoop of vanilla bean ice cream melting into the crevices. The temperature contrast between warm fudgy chocolate and cold creamy ice cream is pretty unbeatable. You could also dust them with powdered sugar right before serving for that bakery look, though they really dont need anything extra.
- A drizzle of salted caramel takes these completely over the top if you are feeling indulgent
- Press a few extra chocolate chips into the top before baking for even more chocolate pockets
- These freeze individually wrapped, perfect for lunch box treats or afternoon snacks
 Save
Save Hope these bring as much joy to your kitchen as they have to mine. Happy baking.
Recipe FAQs
- → Can I use frozen bananas?
-
Yes, frozen bananas work perfectly once thawed and drained. Simply defrost them, discard any excess liquid, and mash as directed. They may even add extra moisture to the bars.
- → How do I know when the bars are done?
-
Insert a toothpick near the center—it should come out with a few moist crumbs but not wet batter. The edges will be set, and the top should appear slightly glossy.
- → Can I make these ahead of time?
-
Absolutely. These bars actually taste better the next day as flavors meld. Store in an airtight container at room temperature for up to 3 days, or freeze for up to 3 months.
- → What if I don't have an 8x8 pan?
-
A 9x9 inch pan works but may require slightly less baking time. For a 9x13 inch pan, double the ingredients and expect a thinner bar that bakes faster.
- → Can I make these gluten-free?
-
Yes, substitute both all-purpose flours with a 1:1 gluten-free flour blend that includes xanthan gum. The texture may be slightly denser but equally delicious.
- → Why did my bars turn out dry?
-
Overbaking is the most common culprit. Check at 28 minutes and remove when moist crumbs appear on the toothpick. Using overripe bananas also ensures maximum moisture.
