 Save
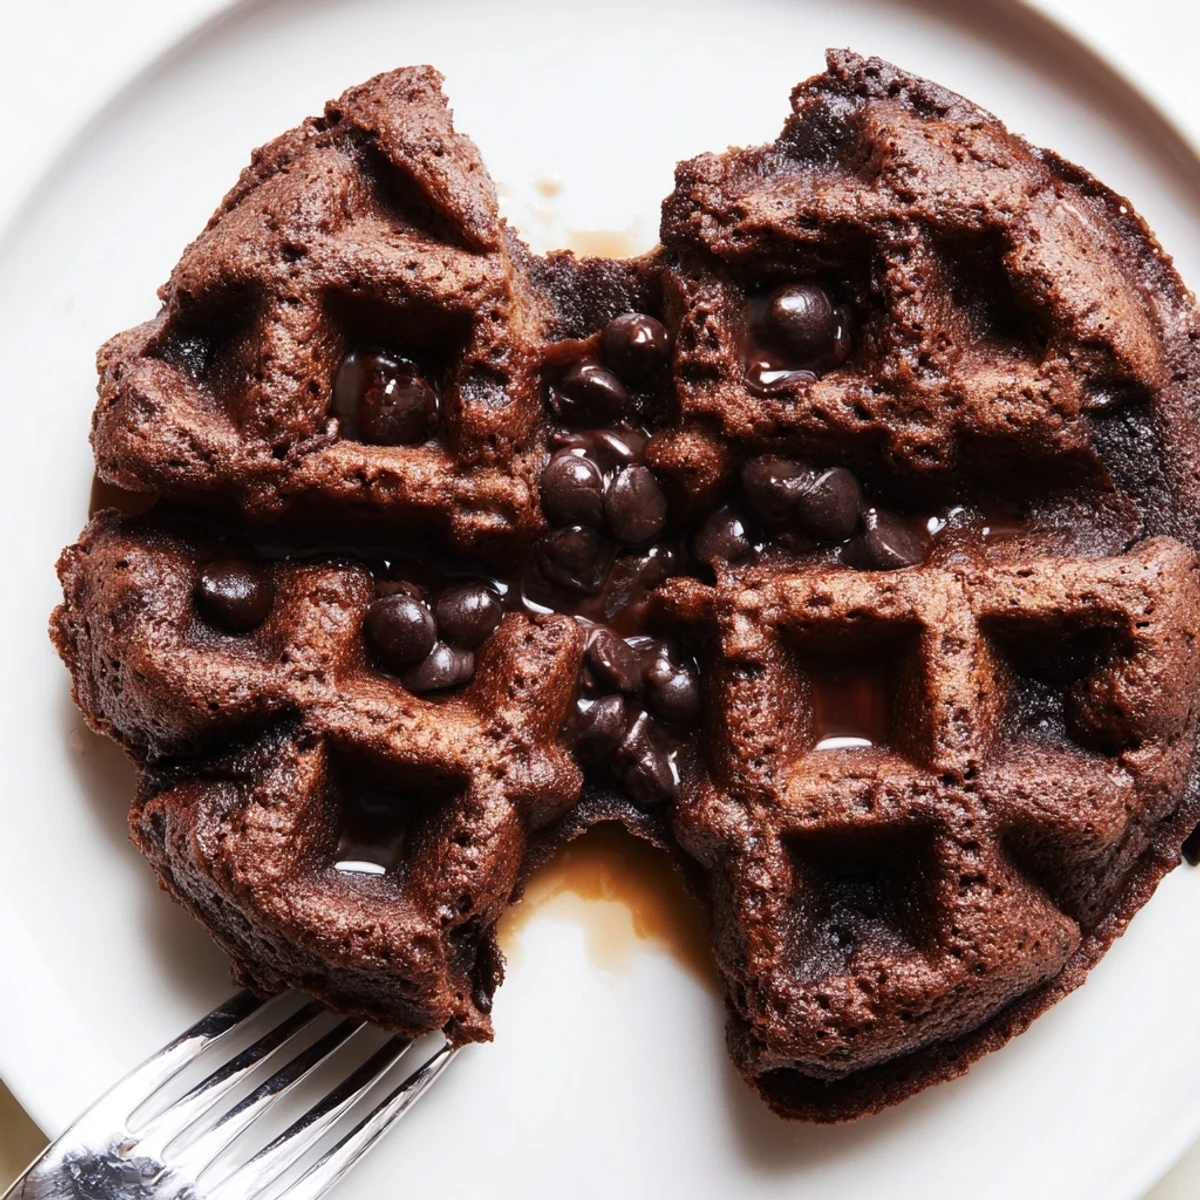
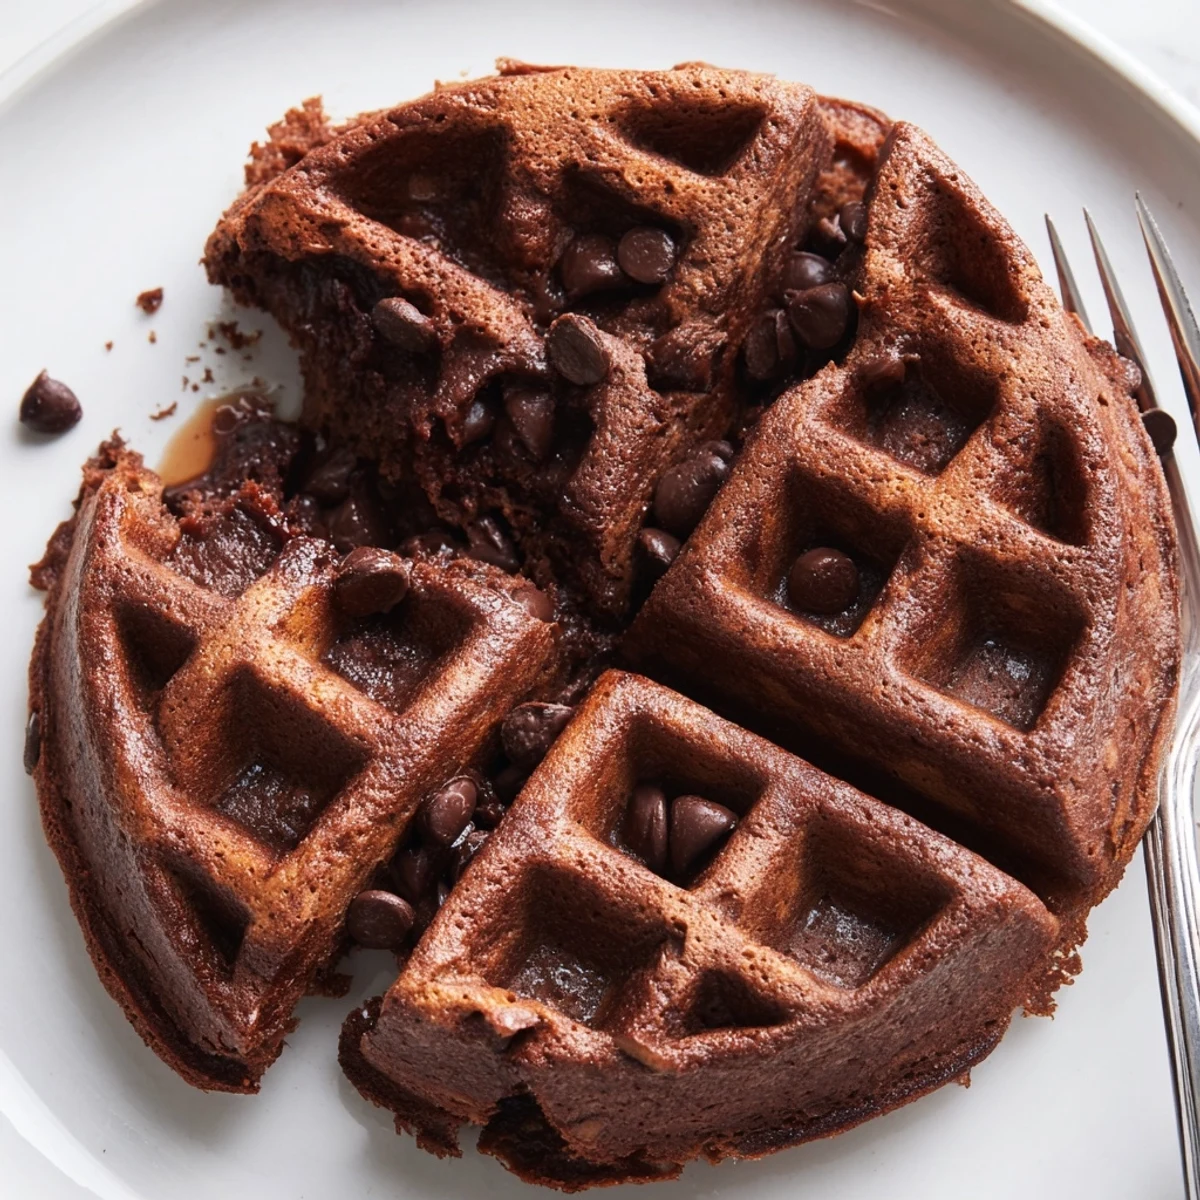
Save These fudgy brownie waffles combine the best of both worlds: a crispy waffle exterior with a rich, dense brownie-like center. Made with melted butter, cocoa powder, and studded with semisweet chocolate chips, they come together in just 30 minutes using basic pantry staples.
Simply whisk the wet ingredients, fold in the sifted dry mixture, and cook in your waffle iron for 3–4 minutes. Serve them warm with whipped cream, fresh berries, or a scoop of vanilla ice cream for an unforgettable brunch or dessert.
My waffle iron sat collecting dust for two years until a rainy Saturday morning when I wondered what would happen if brownie batter met a waffle maker.
I served these to my neighbor after she helped me carry groceries up three flights of stairs and she stood in my kitchen eating one with her bare hands, still hot, not even bothering with a plate.
Ingredients
- Unsalted butter (100 g, melted): Melted rather than softened because it blends seamlessly into the batter and keeps the texture rich.
- Whole milk (120 ml): Whole milk gives the best body here and lower fat versions can make the interior less fudgy.
- Large eggs (2): They bind everything together and contribute to that chewy brownie crumb we are after.
- Vanilla extract (1 tsp): A small amount that quietly lifts the chocolate flavor without stealing the show.
- Granulated sugar (150 g): Essential for the crisp edges and that classic brownie sweetness.
- Unsweetened cocoa powder (60 g): This is where all the deep chocolate flavor comes from so use a decent brand you enjoy.
- All-purpose flour (120 g): Measured by spooning into the cup and leveling off to avoid dense results.
- Baking powder (½ tsp): Just enough lift to keep them from turning into hockey pucks.
- Salt (¼ tsp): Do not skip this because salt makes chocolate taste more like itself.
- Semisweet chocolate chips (100 g): They melt into little puddles inside the waffle crevices and that is pure magic.
Instructions
- Fire up the iron:
- Preheat your waffle iron according to the manufacturers instructions while you mix the batter and let it get good and hot.
- Blend the wet team:
- In a large bowl whisk the melted butter, milk, eggs, and vanilla until everything looks smooth and slightly glossy.
- Sift the dry crew:
- In a separate bowl sift together the sugar, cocoa powder, flour, baking powder, and salt so there are no cocoa lumps hiding anywhere.
- Bring them together:
- Gradually add the dry ingredients to the wet mixture and stir gently until just combined, stopping before the batter looks perfectly smooth because a few streaks are fine.
- The chocolate chip moment:
- Fold in the chocolate chips with a spatula and try not to eat half the batter raw like I do every single time.
- Into the iron they go:
- Lightly grease your waffle iron then pour about half a cup of batter into the center, close the lid, and let it work its thing for three to four minutes until the outside is crisp and the center is set but still soft.
- Careful removal:
- Gently lift each waffle out with a fork or spatula and repeat with the remaining batter, keeping finished waffles warm in a low oven if needed.
 Save
Save The first time I pulled one of these off the iron I actually laughed out loud because the grid pattern stamped into a brownie felt like some kind of beautiful kitchen accident.
Serving Ideas Worth Trying
A scoop of vanilla ice cream melting over a warm waffle on a Tuesday night turns an ordinary evening into something worth remembering.
Making Them Your Own
Chopped walnuts or pecans folded into the batter add a welcome crunch that plays beautifully against the soft interior.
Storage and Reheating
Leftover waffles keep well in an airtight container in the fridge for up to three days and reheat in the toaster beautifully.
- Freeze them in a single layer on a baking sheet before transferring to a bag for up to two months.
- Pop frozen waffles straight into the toaster on a medium setting for a quick dessert emergency.
- A quick drizzle of warm chocolate sauce right before serving makes them taste freshly made.
 Save
Save These brownie waffles are proof that sometimes the best recipes come from simply asking what if and being brave enough to find out.
Recipe FAQs
- → Can I make the batter ahead of time?
-
Yes, you can prepare the batter up to 24 hours in advance. Store it covered in the refrigerator and give it a gentle stir before cooking. The batter may thicken slightly, so you can add a splash of milk to loosen it if needed.
- → What type of waffle iron works best?
-
A standard Belgian waffle iron works beautifully, but any waffle maker will do. A non-stick model is ideal since the chocolate batter can stick. Just be sure to lightly grease the plates before each waffle for easy release.
- → How do I store leftover waffles?
-
Let the waffles cool completely, then store them in an airtight container in the refrigerator for up to 3 days. You can also freeze them for up to 2 months by placing parchment paper between each waffle to prevent sticking.
- → How do I reheat them while keeping the fudgy texture?
-
For the best results, reheat in a toaster or oven at 175°C (350°F) for about 5 minutes. This restores the crisp exterior while keeping the center soft and fudgy. Avoid microwaving, as it can make them soggy.
- → Can I make these gluten-free?
-
Absolutely. Swap the all-purpose flour for a 1:1 gluten-free flour blend. The texture will be nearly identical. Just double-check that your chocolate chips and other ingredients are certified gluten-free as well.
- → Why are my waffles sticking to the iron?
-
Sticking usually happens when the iron isn't properly preheated or greased. Make sure your waffle iron is fully heated before adding batter, and lightly coat it with cooking spray or melted butter between each waffle.
