 Save
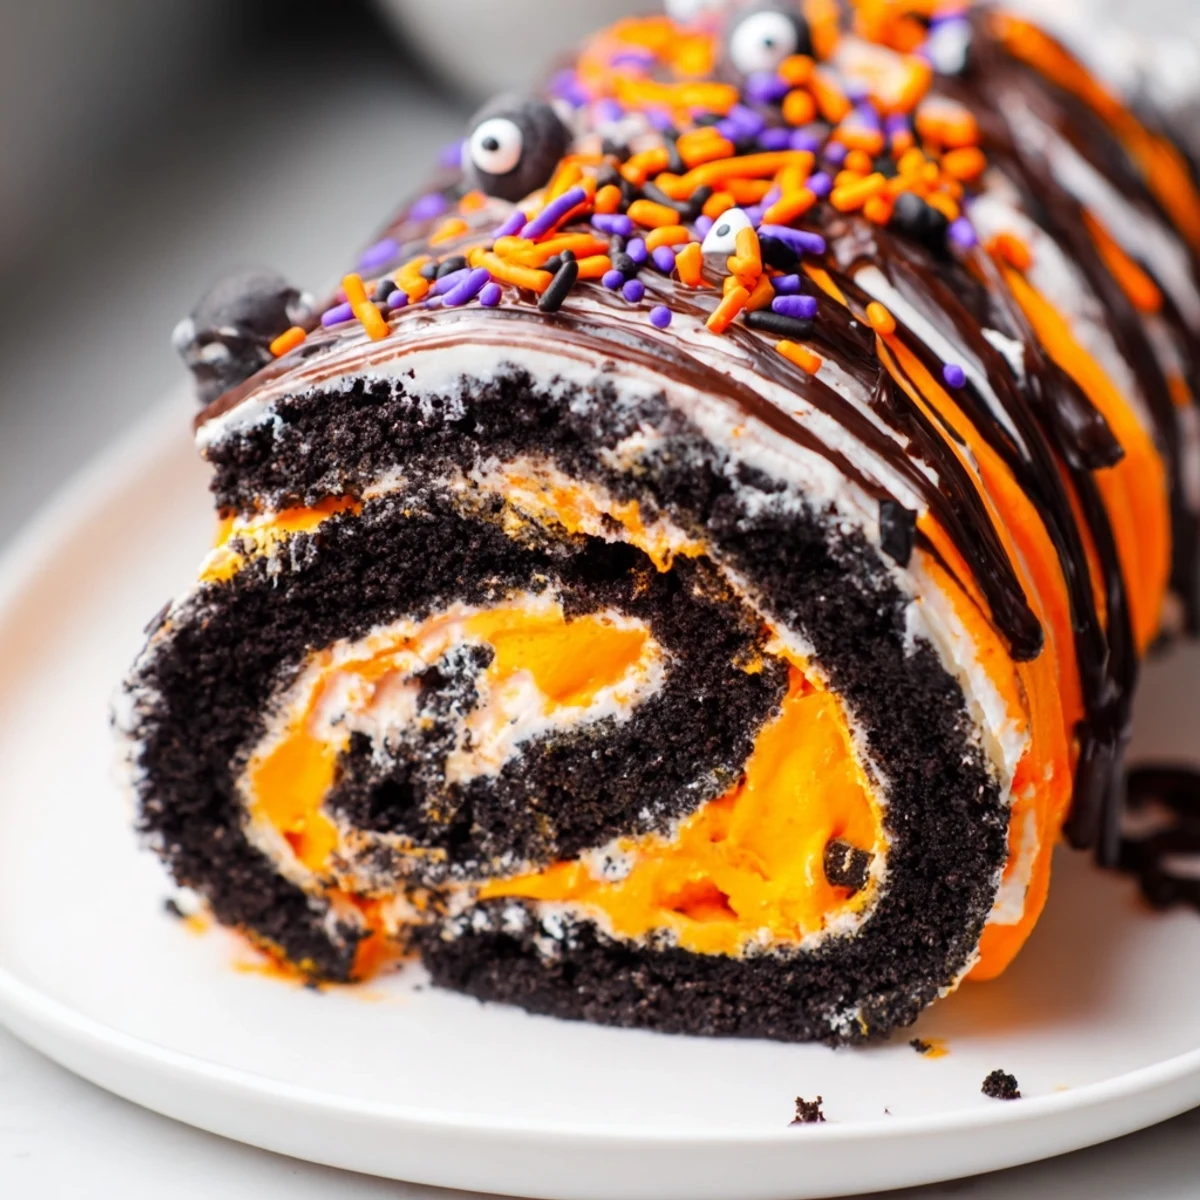
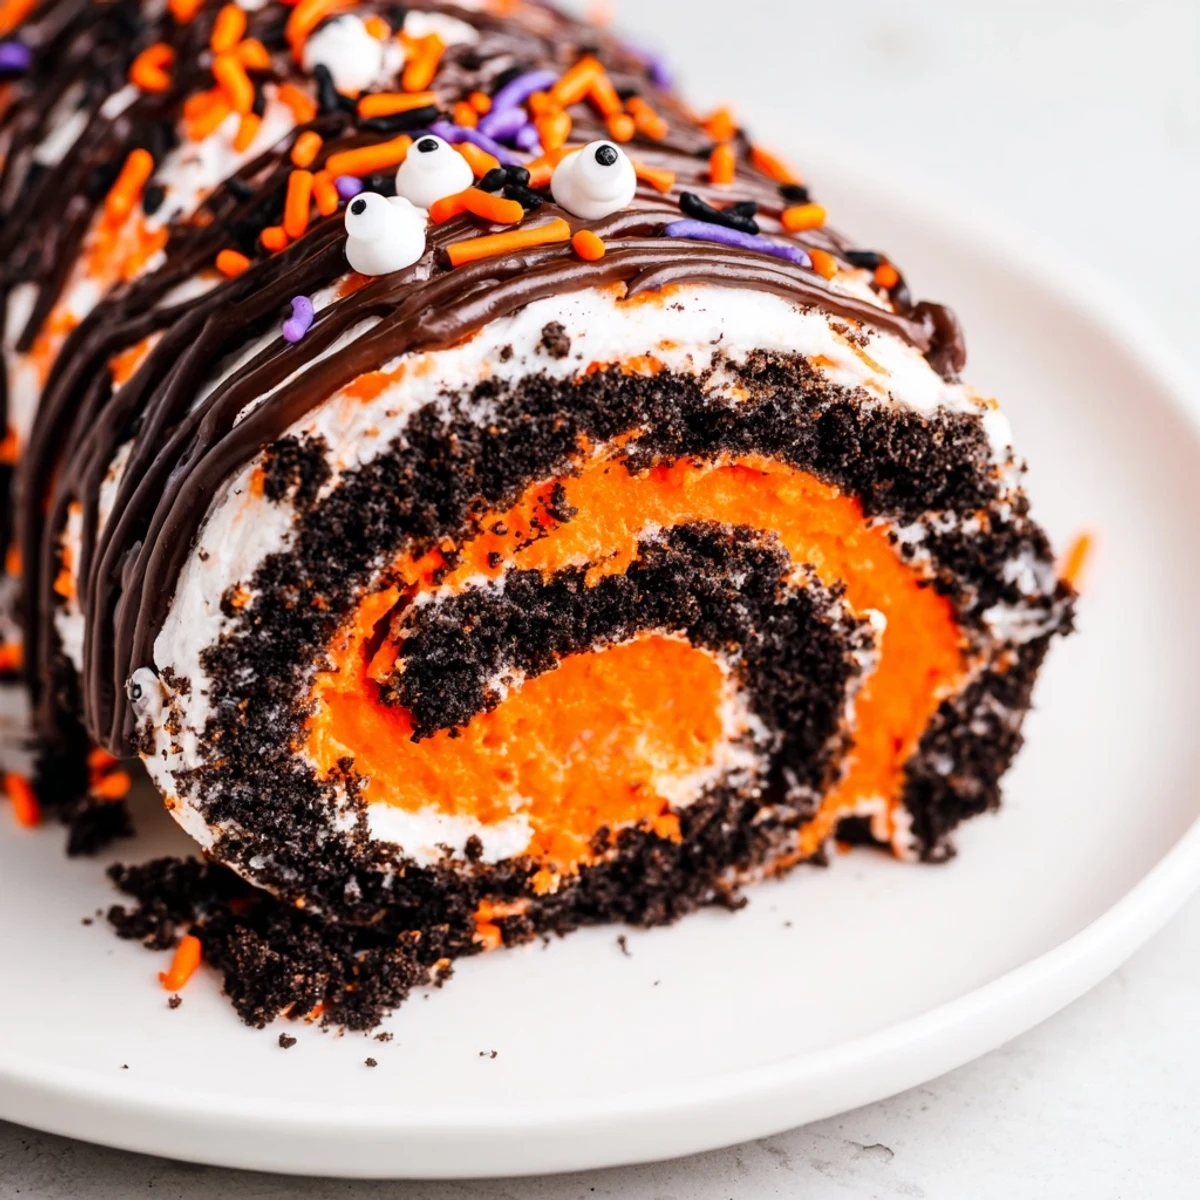
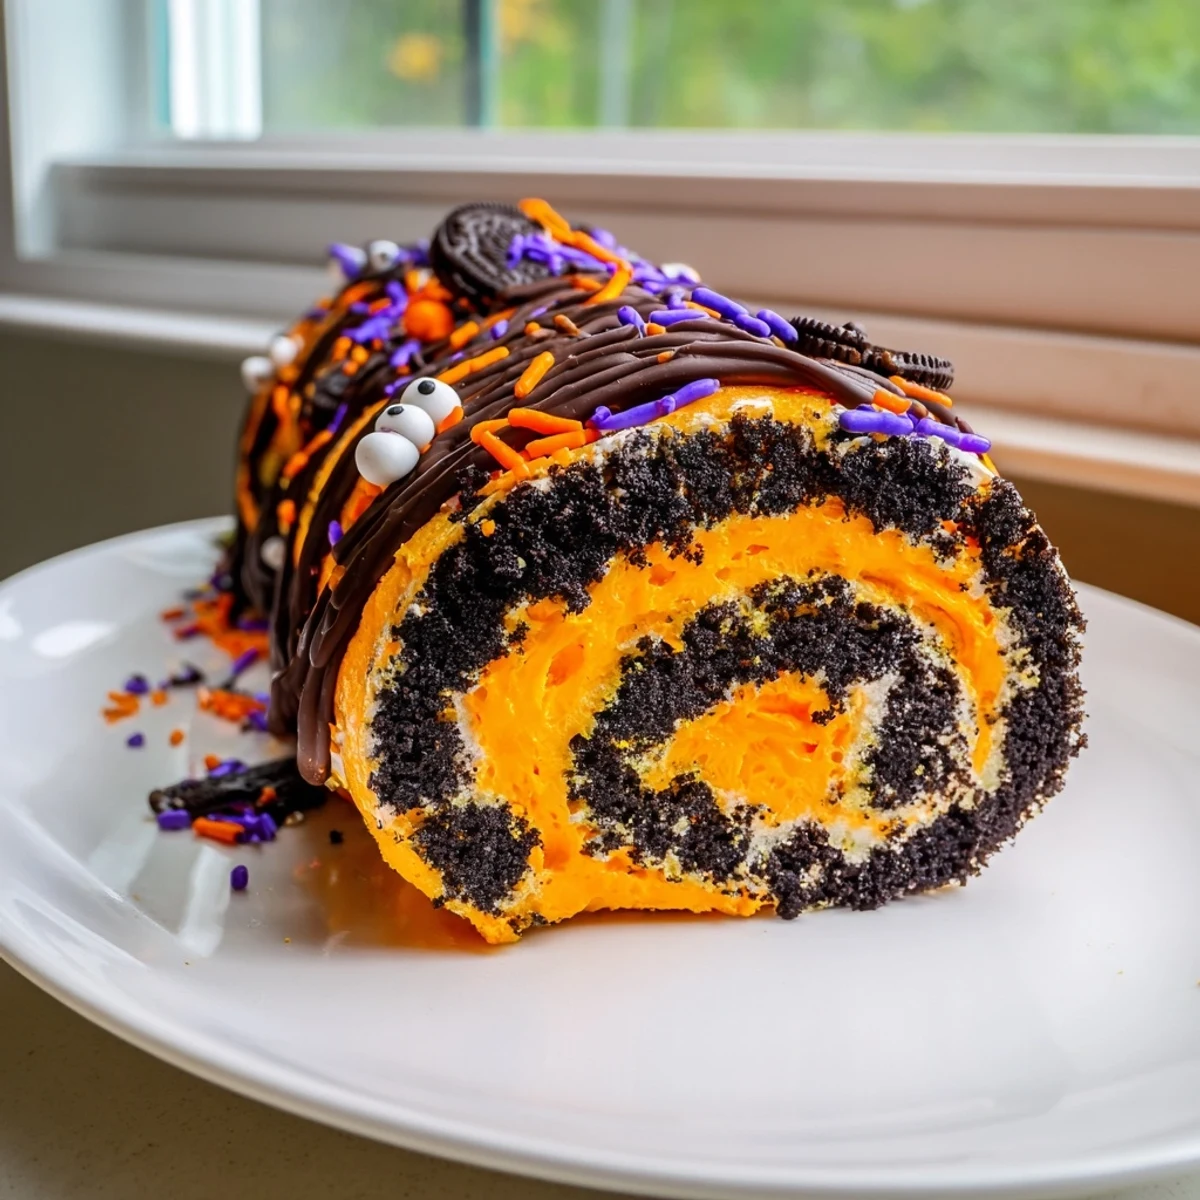
Save Create this festive Halloween roll with a cookies and cream base made from crushed Oreos, butter, and cream cheese. The vibrant orange or purple whipped cream filling adds a spooky touch, perfect for parties. Simply roll, chill for one hour, and slice into servings. Customize with Halloween sprinkles, candy eyes, and chocolate drizzle for extra flair.
The best ideas always seem to hit you at midnight, and this no-bake Halloween Oreo roll was no exception. I had a party the next day, zero energy to turn on the oven, and a mountain of those limited edition orange-filling Oreos that appear in stores every October. Something about smashing cookies with a rolling pin at 11 PM feels delightfully rebellious, like kitchen stress relief disguised as dessert prep.
Last year my niece dubbed it the spider cake because of the way the chocolate drizzle looked, and honestly I leaned into it with some plastic spider rings on the serving platter. Watching adults get genuinely excited about cutting into a roll that looks like it came from a bakery while knowing it was just cookies and cream cheese mashed together—thats the kind of kitchen win that keeps you smiling for days.
Ingredients
- Halloween Oreos: Those orange and purple ones are worth hunting down because the colored cream makes the swirled filling look magical
- Powdered sugar: Two separate amounts—one for the cookie base to bind everything together, one for sweetening the cream filling
- Unsalted butter: Melted so it distributes evenly through the crushed cookies for that perfect press-in texture
- Cream cheese: Softened to room temperature so it blends smoothly into the cookie mixture without lumps
- Heavy whipping cream: The magic that transforms into the fluffy, colored filling—chill your bowl first for best results
- Vanilla extract: Pure vanilla makes the cream taste like something special, not just sweetened whipped cream
- Food coloring: Orange or purple gel coloring works best without watering down the whipped cream
- Sprinkles and candy eyes: Go wild here—the more Halloween chaos on top, the better
Instructions
- Prep your workspace:
- Line a baking sheet with parchment paper, taping the corners so it stays put while you work
- Crush the cookies:
- Pulse the Oreos in a food processor until they are fine crumbs, or put them in a bag and crush with a rolling pin until no large chunks remain
- Make the dough:
- Mix the crushed cookies with powdered sugar, melted butter, and softened cream cheese until everything comes together into a sticky, fudge-like mixture
- Roll it out:
- Place the Oreo dough between two sheets of parchment and roll into a rectangle about half an inch thick, aiming for roughly a 10 by 14 inch shape
- Whip the cream:
- Beat the heavy cream with powdered sugar and vanilla until stiff peaks form, then gently fold in food coloring until you have a vibrant orange or purple cloud
- Spread the filling:
- Evenly spread the colored whipped cream over the Oreo base, leaving a one inch border along one long edge so the filling does not squish out when rolling
- Form the roll:
- Use the parchment paper to lift and roll from the filled long edge toward the border, rolling tightly but gently, then place seam side down
- Chill thoroughly:
- Refrigerate for at least one hour until firm—this step is non-negotiable unless you want a dessert that falls apart when sliced
- Add the decorations:
- Drizzle with melted chocolate, pile on sprinkles, add candy eyes, and let your inner Halloween enthusiast run wild
- Slice and serve:
- Use a sharp knife wiped clean between cuts to make clean one inch slices, and keep them chilled until serving time
 Save
Save There is something genuinely satisfying about slicing into this roll and seeing that spiral pattern—like you pulled off some fancy patisserie move, but really you just smashed cookies and whipped cream. It has become my go-to for any Halloween gathering because it feeds a crowd, looks dramatic, and everyone assumes it took way more effort than it actually did.
Make It Your Own
Sometimes I swap the regular Oreos for golden ones and use purple filling for a completely different vibe that looks just as festive. The technique stays the same but the flavor becomes lighter and more vanilla-forward, which some people actually prefer.
Timing Strategy
You can make the entire roll up to two days ahead and keep it tightly wrapped in the refrigerator, then add the decorations right before serving so the sprinkles stay vibrant and the chocolate drizzle looks fresh. This has saved me more than once when party day spirals into chaos.
Serving Secrets
Serve this cold straight from the refrigerator because the filling softens quickly at room temperature. A chilled knife helps with clean slices.
- Clean your knife between every few slices for the prettiest presentation
- Place each slice on a chilled serving platter so they do not slide around
- Have extra sprinkles on hand because people love adding more at the table
 Save
Save This is exactly the kind of dessert that makes people think you are some kind of kitchen wizard, when really you just know how to smash cookies and whip cream. Sometimes the best tricks are the easiest ones.
Recipe FAQs
- → How long does the Oreo roll need to chill?
-
The roll requires at least 1 hour in the refrigerator to firm up before slicing. This ensures clean cuts and helps the log hold its shape when served.
- → Can I make this gluten-free?
-
Yes, substitute regular Oreos with gluten-free sandwich cookies. The remaining ingredients are naturally gluten-free, making this an easy adaptation for those with dietary restrictions.
- → How far in advance can I prepare this?
-
You can make the Oreo roll up to 24 hours ahead. Keep it well-covered in the refrigerator. Add decorations like sprinkles and chocolate drizzle shortly before serving for the freshest appearance.
- → What's the best way to crush the Oreos?
-
A food processor works quickly for fine, uniform crumbs. Alternatively, place cookies in a sealed bag and crush with a rolling pin or heavy utensil. The finer the crumbs, the smoother your base will be.
- → How should I store leftovers?
-
Store any remaining slices in an airtight container in the refrigerator for up to 3 days. The chilled texture remains creamy and the cookies stay perfectly crunchy.
- → Can I use different colors for the filling?
-
Absolutely! While orange and purple are classic Halloween shades, you can use any food coloring to match your party theme. Green works well for a monster-inspired look, or keep it white for a ghostly appearance.
