 Save
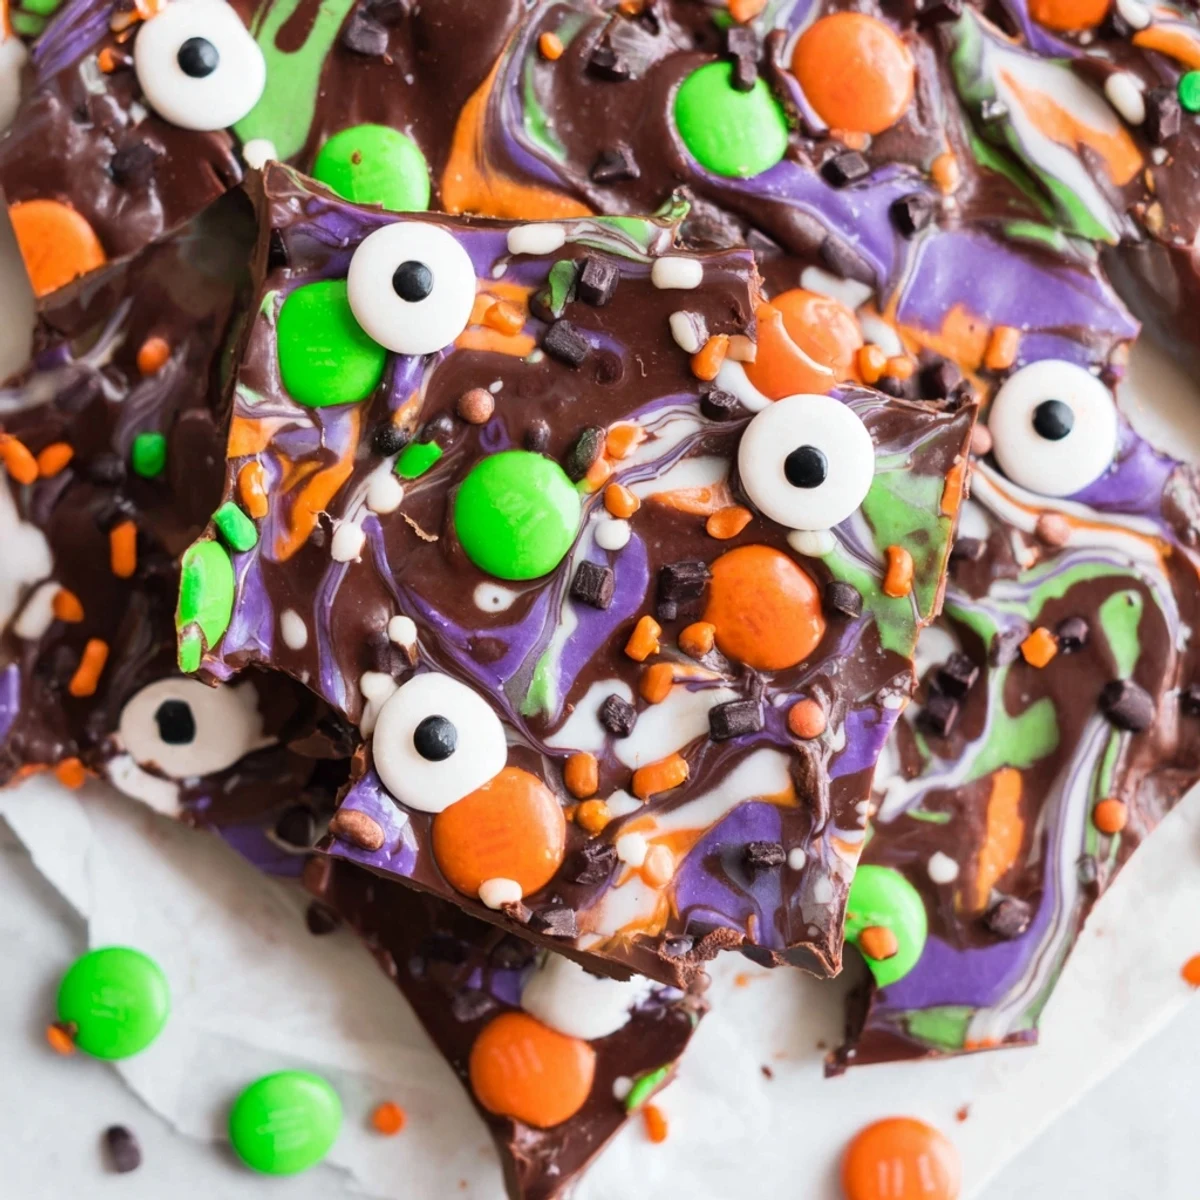
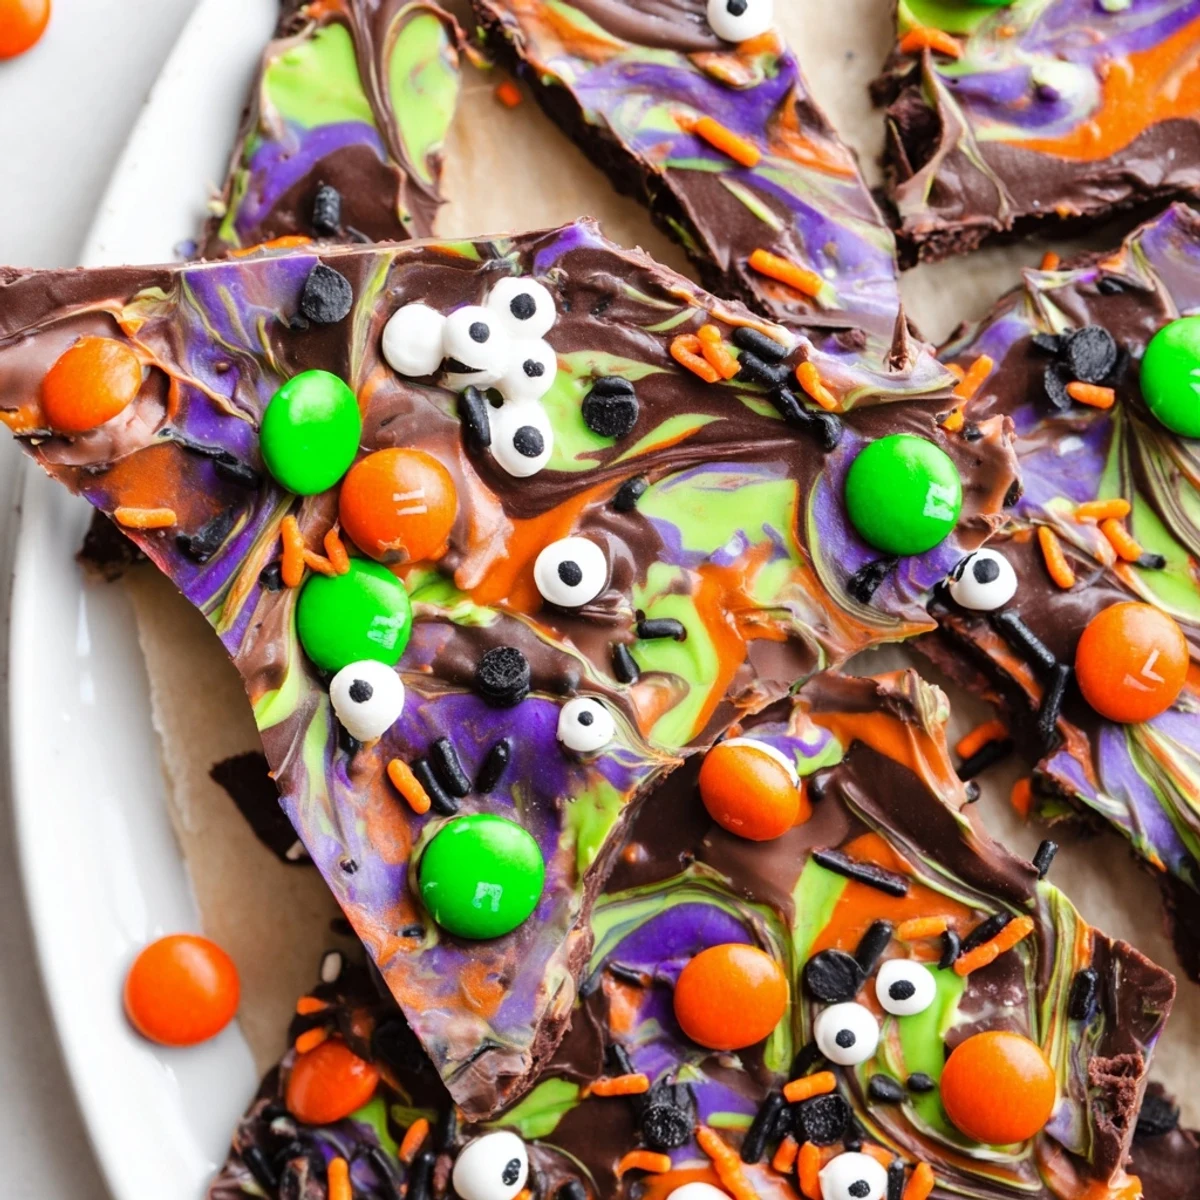
Save This festive Halloween treat layers rich semisweet chocolate with melted white chocolate and vibrant candy melts swirled together for a mesmerizing marbled effect. Topped with candy-coated chocolates, googly candy eyes, and Halloween sprinkles, each piece offers a delightful crunch and playful appearance. The bark comes together in just 20 minutes, making it ideal for last-minute gatherings or classroom treats. Simply melt, spread, swirl, and decorate before breaking into shareable pieces.
Last October my kitchen became a crime scene of chocolate splatters and rainbow candy melts, and I have never laughed harder while making dessert. My daughter decided we needed something spookier than regular cookies for her class party, so we invented this chocolate bark with candy eyes that seemed to watch us work. The way those googly candies stared up from the pan had both of us giggling so hard we nearly dropped the sprinkles.
We made three batches that afternoon because the first one disappeared before it even fully set, my husband sneaking pieces while claiming he was just quality control. My daughter took the remaining bark to school in a coffin shaped box, and her teacher texted me asking for the recipe before lunch was even over. Now it is the first thing my kids request when the calendar flips to October.
Ingredients
- Semisweet chocolate chips: This creates the rich dark canvas that makes all the colorful toppings pop, and I have found the chips melt more reliably than bar chocolate
- White chocolate chips: Adds creamy sweetness that balances the dark chocolate and creates those gorgeous marble swirls everyone notices first
- Colorful candy melts: These melt beautifully and hold their vibrant hues, essential for getting those spooky purple and green webs running through the bark
- Mini candy coated chocolates: These little bursts of color and crunch remind everyone of trick or treat candy stashes, plus they do not melt when you sprinkle them on warm chocolate
- Candy eyes: The absolute MVP that transforms ordinary bark into something delightfully creepy, and kids go wild for them every single time
- Halloween sprinkles: The final confetti that says celebration even before anyone takes a bite
Instructions
- Prepare your canvas:
- Line a baking sheet with parchment paper, making sure to crease the corners so the chocolate does not sneak underneath and stick to the pan
- Melt the dark chocolate base:
- Pop the semisweet chips in a microwave safe bowl and zap for 30 seconds, stir like your life depends on it, then repeat until the chocolate is satiny smooth
- Spread the foundation:
- Pour that gorgeous melted chocolate onto your prepared sheet and tilt it around until you have an even layer about a quarter inch thick
- Prepare your swirl colors:
- Melt the white chocolate and candy melts in separate bowls, starting with 20 second bursts and stirring between each one
- Create the marble magic:
- Drop spoonfuls of the white and colored chocolates randomly over your dark base, then drag a toothpick through everything to create those wicked swirl patterns
- Add the spooky toppings:
- Scatter your candy coated chocolates, candy eyes, and sprinkles over the warm chocolate immediately so they stick, placing some eyes so they look like they are peeking through the swirls
- Let it set completely:
- Leave the bark at room temperature for about an hour or speed things up in the fridge for 10 to 15 minutes until firm
- Break into pieces:
- Use your hands to snap the bark into irregular jagged pieces, which somehow makes it feel more authentic and Halloween appropriate
 Save
Save The year I made this for a neighborhood Halloween potluck, it was the first dish to vanish completely. One dad told me he normally skips Halloween desserts but ended up guarding the platter so his kids would actually get some. Several neighbors have requested it for every party since, and I have started keeping extra candy eyes in my pantry year round.
Making It Your Own
One of the best things about this recipe is how easily it adapts to whatever spooky theme you have going on. I have made red and green versions for Christmas parties that looked just as festive, and pastel candy melts turn this into the most adorable Easter treat. The technique stays exactly the same no matter what colors or sprinkles you use.
Storage Strategy
This bark keeps surprisingly well, which is both good and bad depending on your self control. I store it in an airtight container between layers of parchment paper so it does not stick together, and it stays fresh for a week at room temperature. The refrigerator makes it extra crisp but can cause those candy eyes to get a bit sweaty, so I prefer the cupboard method.
Troubleshooting
If your chocolate seizes and turns into a grainy mess while melting, do not panic. You can often rescue it by stirring in a teaspoon of vegetable oil until it smooths out again, though the texture might be slightly softer. For white chocolate that refuses to melt smoothly, the same trick works wonders.
- If the bark is too thick to break easily, use a sharp knife to score it into pieces before it completely hardens
- The marble effect looks best if you stop swirling before the colors become completely blended together
- Room temperature chocolate gives the cleanest breaks, while cold chocolate tends to shatter more dramatically
 Save
Save There is something so satisfying about making something that looks impressive but actually requires zero baking skills. Watch your kitchen turn into the coolest spot in the neighborhood.
Recipe FAQs
- → How long does the chocolate bark need to set?
-
The bark sets at room temperature in about 30-45 minutes, or you can refrigerate it for 10-15 minutes to speed up the process. The chilling method is perfect when you're short on time.
- → Can I make this bark ahead of time?
-
Yes! Store the completed bark in an airtight container at cool room temperature for up to one week. Avoid refrigerating for storage as condensation can affect the texture and appearance of the chocolate.
- → What other chocolates can I use besides semisweet?
-
Milk chocolate offers a sweeter profile, while dark chocolate provides a richer, less sweet base. White chocolate works beautifully as the main layer too. Just ensure whatever you choose melts smoothly for even spreading.
- → How do I prevent the chocolate from seizing when melting?
-
Melt in short 20-30 second intervals, stirring thoroughly between each. Avoid overheating and keep water away from the chocolate. If using candy melts, they're more forgiving and designed specifically for melting.
- → Can I add other mix-ins besides candy?
-
Absolutely! Pretzel pieces, chopped nuts, crushed cookies, or even dried fruit work wonderfully. Just add them after swirling the chocolate so they adhere properly to the warm surface.
