 Save
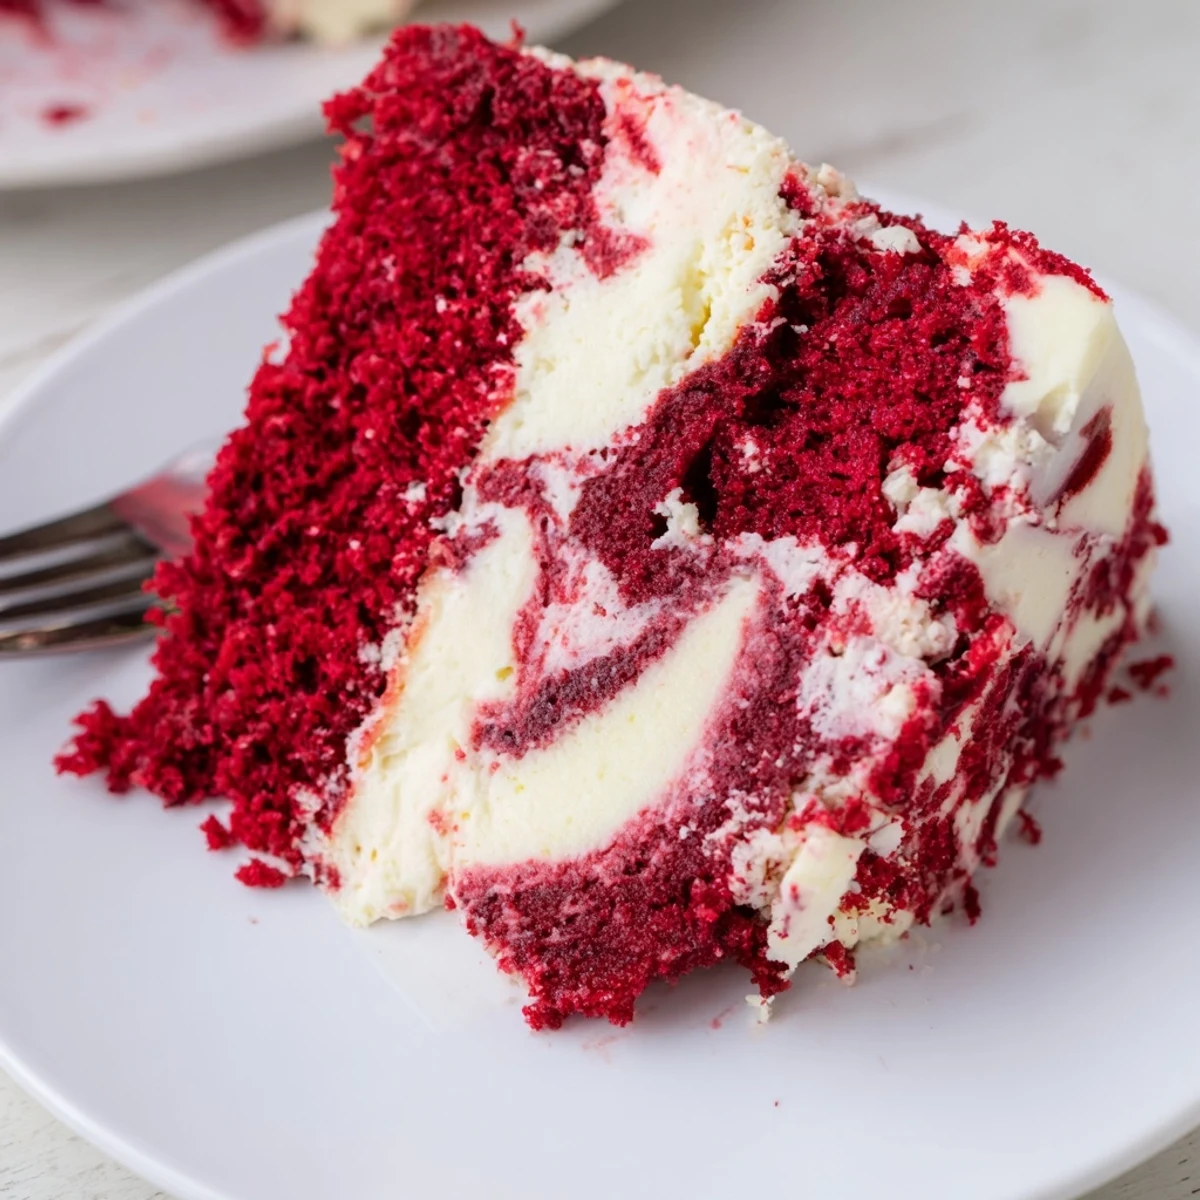
Save This stunning dessert combines the classic appeal of red velvet with tangy cream cheese swirls. The buttermilk-based red velvet batter stays incredibly moist, while pockets of cheesecake add creamy contrast throughout each slice.
Perfect for birthdays, holidays, or whenever you want to impress. The marbling technique creates beautiful patterns that look bakery-quality but come together with simple steps. Serve chilled or at room temperature, optionally dusted with powdered sugar.
The generous 9x13 pan yields 12 substantial slices, making this ideal for gatherings. Leftovers keep beautifully in the refrigerator for up to four days, though it rarely lasts that long.
The kitchen counter was a disaster zone of red splatters and cream cheese smudges, my sister staring skeptically at the bright scarlet batter. Id promised her a showstopper dessert for her birthday, but somewhere between the food coloring and the swirling knife, I started wondering if Id created a monster. That first slice revealed the most beautiful marble pattern Ive ever seen, and the silence around the table as everyone took their first bite was absolutely golden.
Ive made this for everything from holidays to random Tuesday night cravings, and somehow it never fails to make people pause. My neighbor actually knocked on my door the last time I baked it, following the incredible vanilla aroma that somehow escaped through every crack in my windows. Theres something about cutting into that marble pattern that feels like revealing a secret.
Ingredients
- 2 cups all-purpose flour: The foundation that gives this cake its tender crumb and structure
- 1 ½ cups granulated sugar: Perfect sweetness that balances the slight tang from buttermilk
- 1 tsp baking powder and ½ tsp baking soda: The dynamic duo that creates lift and that signature velvet texture
- 1 tbsp unsweetened cocoa powder: Just enough to give depth without overpowering the classic red velvet flavor
- ½ tsp salt: Enhances all the flavors and keeps the cake from tasting flat
- 1 cup buttermilk: The secret ingredient that makes red velvet incredibly moist and tender
- ½ cup vegetable oil: Keeps the cake moist longer than butter would
- 2 large eggs: Room temperature eggs blend better and create a more uniform texture
- 2 tsp vanilla extract: Dont be tempted to reduce thisvanilla is the backbone of the flavor
- 1 tsp white vinegar: Reacts with the buttermilk for extra tenderness
- 2 tbsp red food coloring: Gel coloring gives the most vibrant, professional-looking red
- 8 oz cream cheese: Must be completely softened or youll end up with lumps in your swirl
- ⅓ cup granulated sugar: Just enough to sweeten the cheesecake without making it cloying
- 1 large egg: Binds the cheesecake layer together
- 1 tsp vanilla extract: Pure vanilla makes all the difference in the swirl
Instructions
- Get your oven ready:
- Preheat to 350°F and line a 9x13-inch pan with parchment papergrease it well because this cake likes to stick
- Whisk the dry ingredients:
- Combine flour, sugar, baking powder, baking soda, cocoa powder, and salt in a large bowl
- Mix the wet ingredients:
- Whisk together buttermilk, oil, eggs, vanilla, vinegar, and that vibrant red food coloring until well combined
- Combine and be gentle:
- Pour wet into dry and mix just until combinedovermixing will make your cake tough
- Spread the red velvet base:
- Pour batter into your prepared pan and smooth it evenly with a spatula
- Make the cheesecake swirl:
- Beat softened cream cheese until smooth, then add sugar, egg, and vanilla until creamy and blended
- Create the marble magic:
- Dollop spoonfuls of cheesecake mixture over the red velvet batter, then use a knife to gently swirl
- Bake to perfection:
- Bake for 45 to 50 minutes until a toothpick comes out mostly cleana little cheesecake on it is perfectly fine
- Patience is key:
- Cool completely in the pan before slicing, or youll end up with a beautiful but messy situation
 Save
Save This recipe became my go-to the year my daughter requested a red and white themed birthday party. I was nervous about getting the swirl just right, but something clicked that day in the kitchen and suddenly I understood the rhythm of the knife. Now its the cake my friends request most often, and honestly, I never mind obliging.
Getting That Perfect Swirl
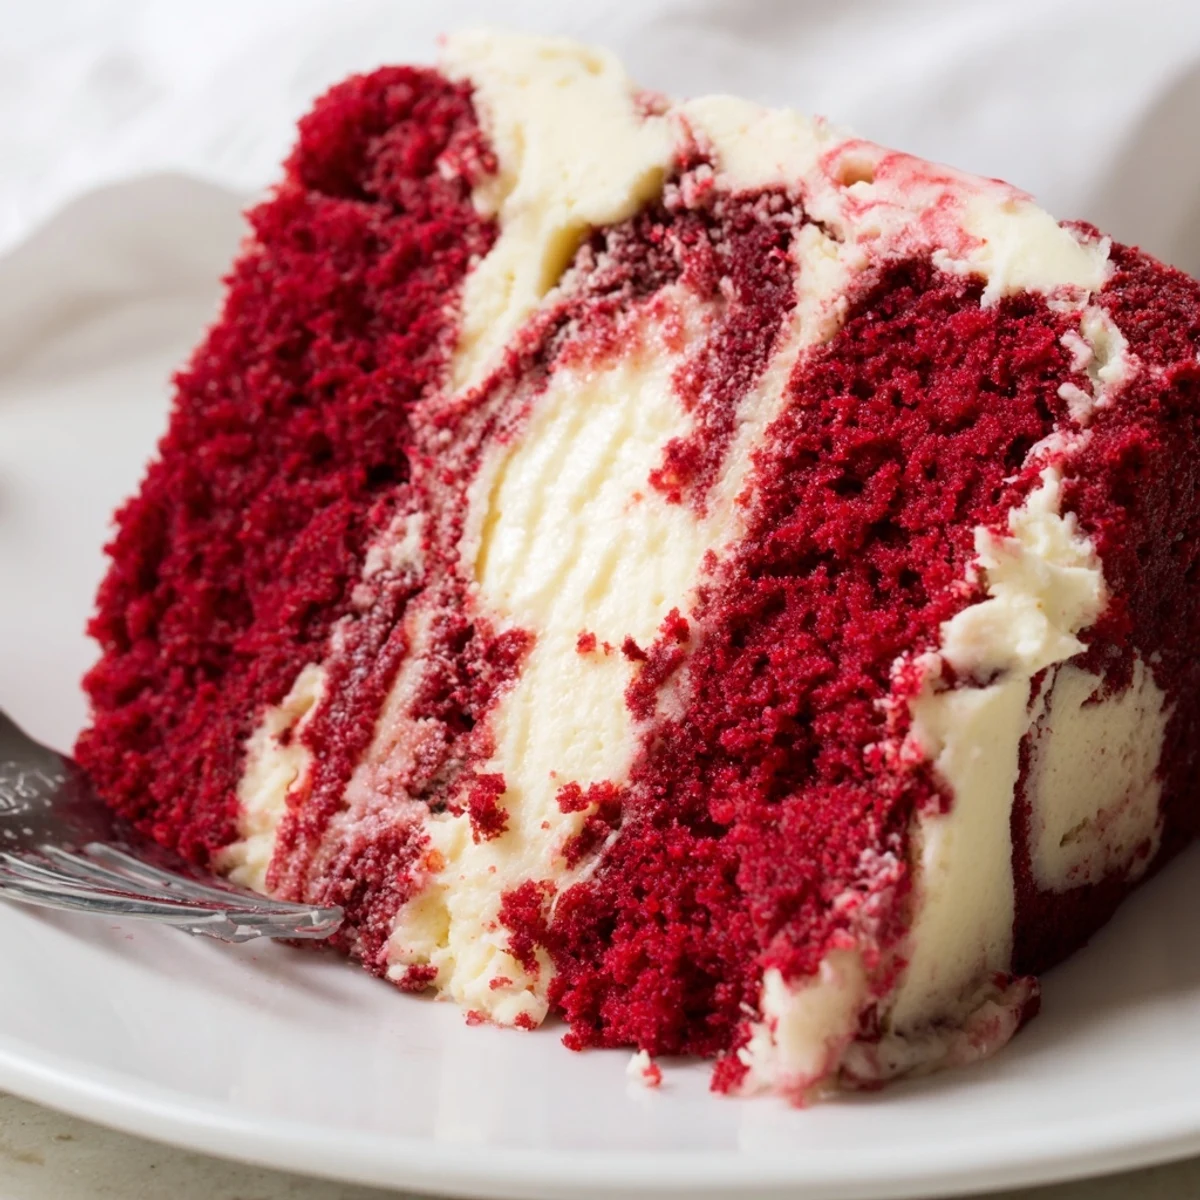
I learned the hard way that aggressive swirling turns beautiful marble into a muddy pink mess. The secret is using a gentle figure-eight motion and knowing when to stopyour knife should barely skim through the layers. The contrast between the red velvet and cream cheese is what makes this cake stunning.
Temperature Matters
Cold ingredients create lumps that ruin the silky texture of the cheesecake swirl. I take everything out at least an hour before baking, and I promise the extra planning is worth it for that smooth, creamy ribbon running through each slice. Room temperature eggs also incorporate more air into your batter.
Serving and Storage Secrets
This cake actually tastes better the next day when the flavors have had time to mingle and the texture sets completely. I love serving it slightly chilled because the cheesecake becomes almost fudge-like and incredibly creamy.
- A dusting of powdered sugar right before serving makes it look bakery-fresh
- Leftovers keep beautifully in the refrigerator for up to four days
- Bring slices to room temperature for about 20 minutes before serving for the best texture
 Save
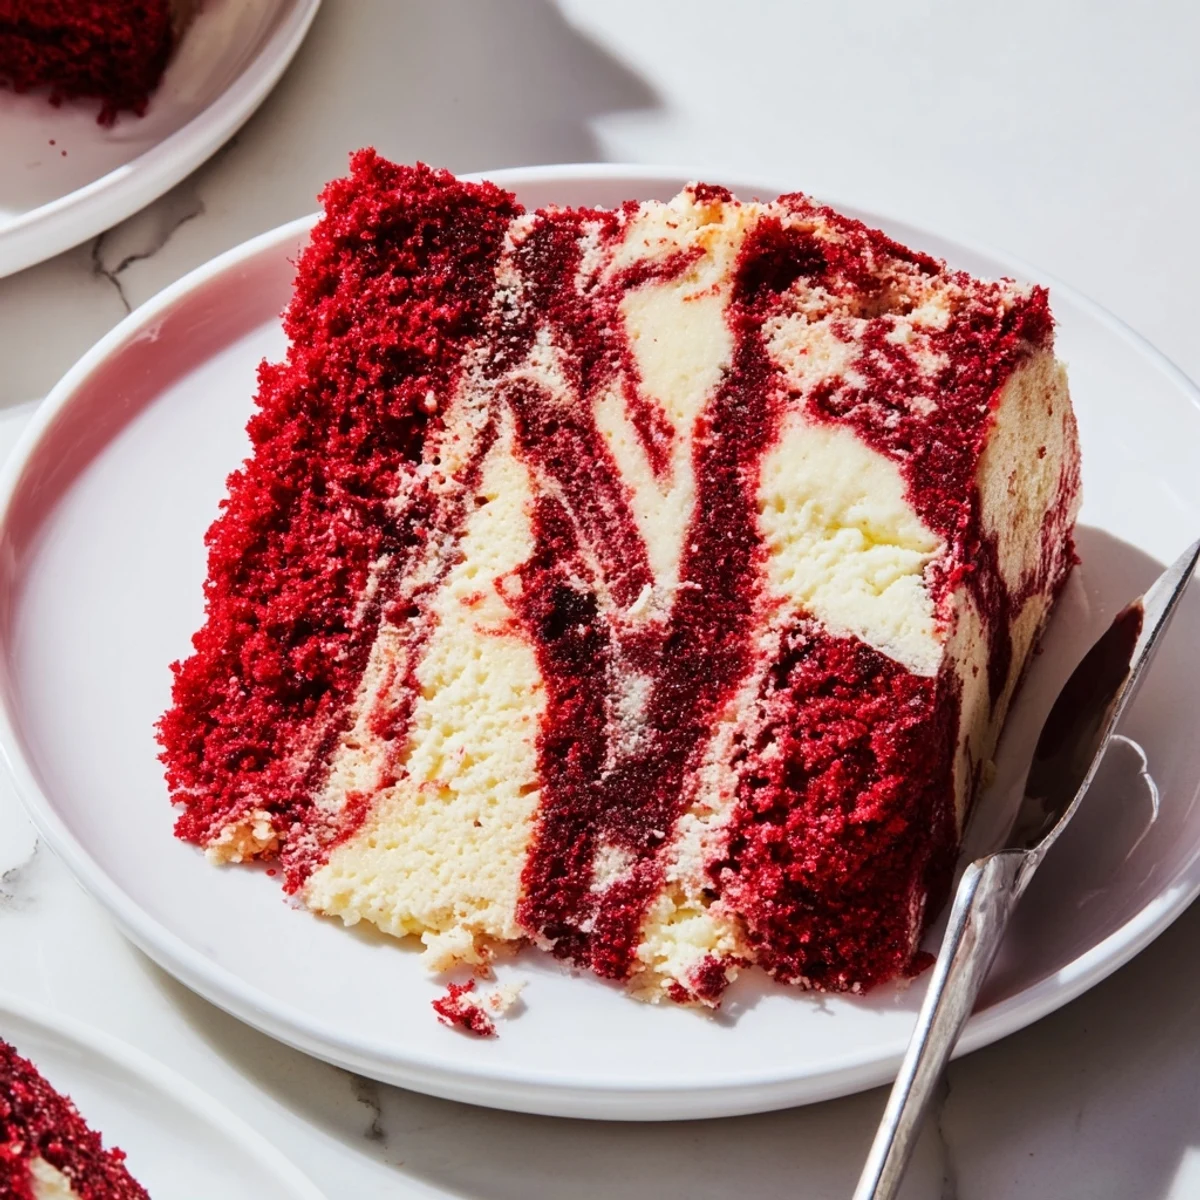
Save Theres nothing quite like watching someones face light up when you cut into that first slice and reveal the marble pattern inside.
Recipe FAQs
- → How do I get the best marble effect?
-
Drop spoonfuls of cheesecake batter randomly over the red velvet base, then gently drag a knife or skewer through both layers in swirling motions. Avoid over-swirling, which blends the batters too much. Just 3-4 passes creates beautiful distinct marbling.
- → Can I make this ahead of time?
-
Absolutely. This dessert actually tastes better after chilling overnight as flavors meld. Bake completely, cool to room temperature, then refrigerate tightly covered. The texture remains perfectly moist for up to 4 days. Bring to room temperature 30 minutes before serving if preferred.
- → Why is my red velvet batter brown instead of red?
-
The cocoa powder naturally darkens the batter. For vibrant red color, use gel food coloring rather than liquid—it provides richer hue with less product needed. Start with 1 tablespoon gel coloring and add more to reach your desired shade. Natural cocoa works best here.
- → What's the difference between red velvet and chocolate cake?
-
Red velvet uses minimal cocoa for subtle chocolate flavor, while buttermilk and vinegar create its signature moist, tender crumb. The reaction between buttermilk and cocoa also enhances the reddish tones. It's lighter and less intensely chocolate than standard chocolate cake.
- → Can I freeze this cake?
-
Yes, freeze exceptionally well. Cool completely, wrap tightly in plastic then foil, and freeze for up to 3 months. Thaw overnight in the refrigerator before serving. The cream cheese swirl maintains its texture perfectly through freezing and thawing.
- → What pan size works best?
-
A 9x13-inch pan provides ideal thickness—about 2 inches tall when baked. This size allows proper heat distribution for even cooking. For thicker slices, use a smaller pan but increase baking time by 10-15 minutes. Avoid round pans as the swirl technique works best in rectangular shapes.
